Article: How to Pattern a Bias Skirt for Pleating
How to Pattern a Bias Skirt for Pleating
This post is meant to be read as a followup to last week’s post titled Bias Skirts 101.
Many of our clients ask us if the pleating be cheaper if they cut their own fabric. Theoretically, yes it is cheaper but we usually find they cut the fabric incorrectly or crooked, which actually ends up taking us more time to pleat or compromise on quality…and we hate poor quality pleating. So, in this post I will show you how to make a quick pattern for a bias circle skirt so your pleats will be perfect.
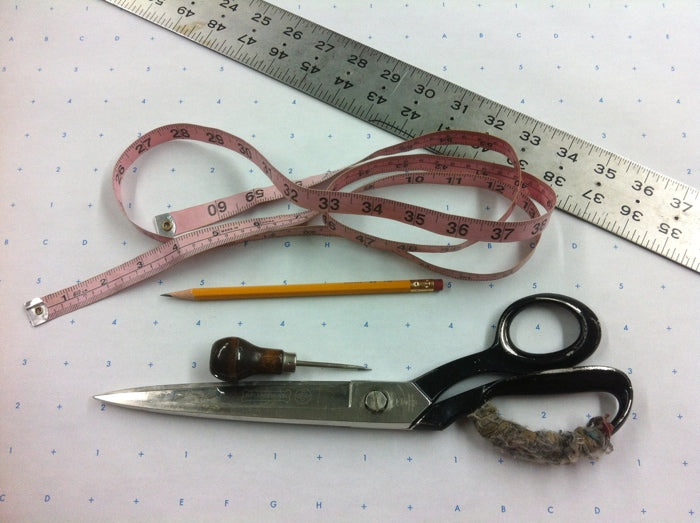
You will need the following:
– A large table to draft a pattern and cut your fabric. (Minimum 30 x 60 in )
– A large sheet of paper, preferably a roll or pattern paper.
– A tape measure
– A 36in. long ruler
– An awl or a push pin.
– A pencil
– Scissors

The pattern we will make will be for our short sunburst accordion patterns. Our short patterns max out at 24 inches so that dimension plus 6 inches to the center of the circle equals 30 inches total. The six inches is at the waist but if that doesn’t make sense now, don’t worry. All will be explained later…and if you are still confused, just call us and ask us what you need to do. The steps in this pattern can be applied to any skirt length.
Step 1: Spread your pattern paper on the table at least 62 inches long since the circle diameter will be 60 inches. Grab your ruler and make a line one inch up from the bottom edge of the pattern paper, the entire length of the 62 inches.

Step 2: Now make a notch in the center of your line. If you made your line 62 inches then mark the center at 31 inches.

Step 3: Now from the center notch you just made, draw a line 90 degrees (perpendicular) to the first line you made in step 1.

This is what you should have so far. A t-shape, this will be the center of your circle.

Step 4: Put a pin inside the hole of the eyelet at the end of the tape measure and pin it to the center of your pattern. Make sure it is tight enough to hold the tape measure in place but not too tight as to restrict it from moving freely.

Step 5: This step can be skipped if you are just ordering a sample or if you are not certain of the size of customer’s waist. For the sake of this lesson we are drawing a six inch radius which is probably for a size two. There is more information regarding this step in the Bias Skirt Fabric Calculator. Unless you are making at least two dozen skirts, we recommend not cutting out the waist area. It it easier to just cut it after pleating to your desired waist measurement and it is easier to store the pleating without damaging them if you decide to hang them. This area alone is worth one or two blog posts so I will address that in the future. In the meantime, follow along but don’t cut it out. If you are not certain what you want to do or have any questions, just call, post a comment or email us. We are more than happy to help you out. Now…moving right along. Put the pencil at the six inch mark along the tape and hold them together. Then draw a half circle around the center of the circle.

When you are done you should have the following. A small half circle with a diameter of 12 inches or a radius of 6 inches.

Step 6: Now we will draw the hem of the skirt. As I mentioned earlier our short pattern is 24 inches long. When you add that to the 6 inch line we just made for the waist, you get 30 inches to the center of your circle. So grab the pencil again and hold it at 30 inches and draw a nice big circle. Hold the pencil in exactly the same tangent as you draw the circle.

This is what you should have so far. Two nice half circles, one small one for the waist and one big one for the hem of the skirt.

Step 7: Now we have to find the bias grain line. To do this we need to measure exactly a quarter of the circle and get a center measurement. Measure from the top center of the half circle to one side of the pattern. We measured 42 inches.

Since we measured 42 inches we are marking 21 inches for the center. We are basically dividing the quarter of the circle.

Step 8: Now take a long ruler and draw a line through your new mark to the center point of your circle.

Step 9: Now we need a notch at the hem of the line you just made and a notch at the center (top) of your pattern.

Also, we need notches along the waist at the bias grain line and at the center. However, remember…for samples it is not important to cut out the waist. The SUPER MOST important thing is a notch at the center of your circle. If you look at the picture below, we have this circled in pink.

So let’s take another look at what you should have so far. Below I noted the grain lines on the pattern with cross grain, straight grain and bias grain.

Thats basically it. I know we only did half so you can either fold the pattern in half and cut it out to true the pattern symmetrically or you can just repeat the same process on the other side to get the grain line. In review, the most important thing for you to send us for pleating is a half circle with four notches. Two center notches and two on the bias grain at the hem. Check the photo below.

If want to cut out the waist measurement as well, make sure you add the notches at the waist line on the bias grain. If you have ever worked with another pleater you might be asking yourself why you need all these notches? I never needed them before. The answer is so we can precisely control the grain line while we pleat to give you a perfect product so you won’t have any curling or nightmare seam line. Just check my other post for more info regarding poor quality pleating.
As a final note, you need to realize that this pattern is made for fabrics with relatively minimal stretch. For fabrics like chiffon that get longer on the bias grain, we need to make some adjustments to the pattern. I will show you how to deal with that later. I hope this was clear enough and not too confusing. The next post will be about cutting out the pattern.
